
10 DIY Resin Coaster Designs You Can Try This Weekend
Introduction
Starting out with resin can feel a little intimidating, but coasters are the ultimate "low stakes, high reward" project. They don't require gallons of material, and they give you a small canvas to test out different artistic techniques without the pressure of a massive price tag. If you’re looking to move beyond basic clear pours, here are ten ways to really make your coasters stand out.
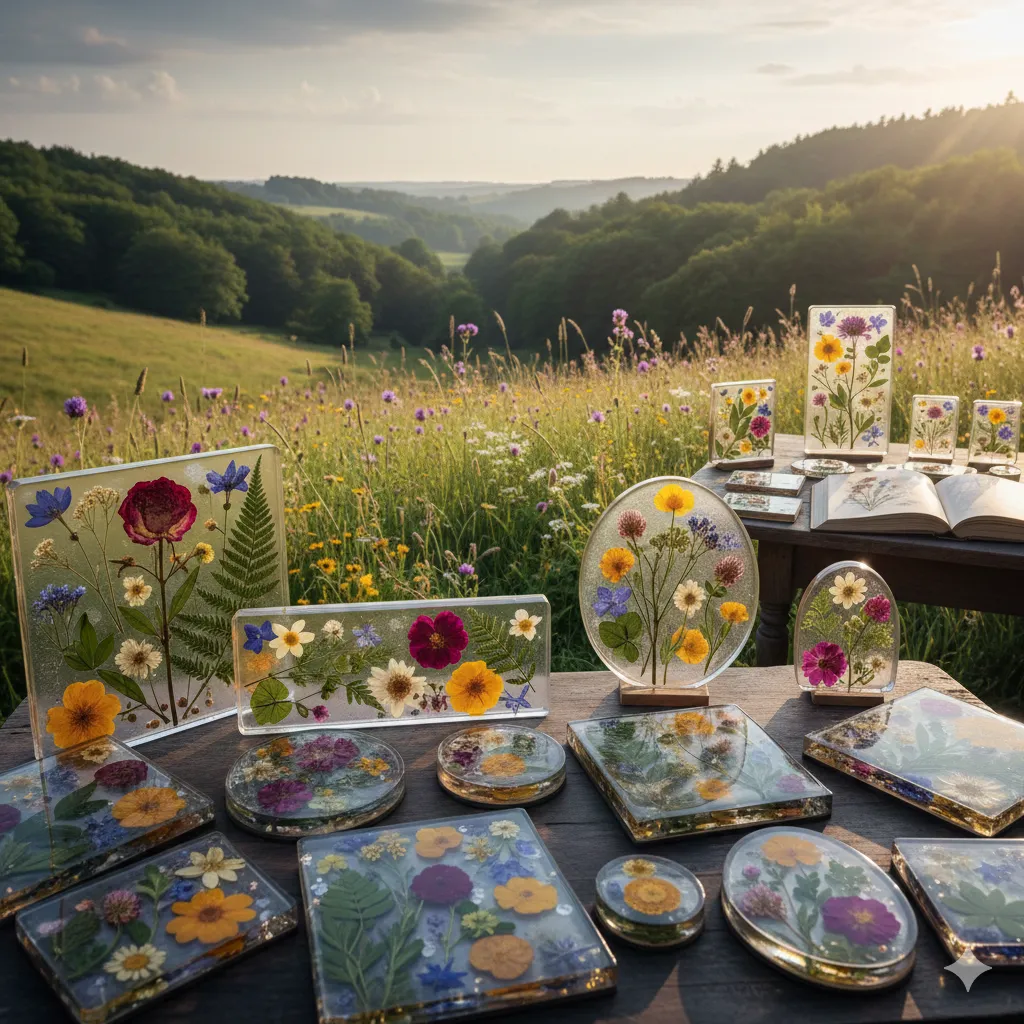
The Timeless Look of Pressed Botanicals
There’s a reason you see dried flowers in resin everywhere—it just works. Whether it’s tiny daisies, bits of lavender, or even colorful autumn leaves, embedding nature into epoxy creates a beautiful, preserved specimen. One thing I’ve learned the hard way: make sure your flowers are 100% dry. If there’s even a hint of moisture left in the petals, they’ll turn a muddy brown inside the resin within a few weeks.
Creating Mini Oceans with Resin Lacing
If you’ve spent any time on Instagram lately, you’ve definitely seen the "ocean pour." It’s a blast to create. You start by layering different blues—navy at the bottom and a lighter aqua toward the "shore." To get those realistic white bubbles, or "lacing," you drop a bit of white pigment at the edge and use a heat gun to blow it across the blue. It’s a bit of a balancing act, but when those cells start to form, it feels like magic.

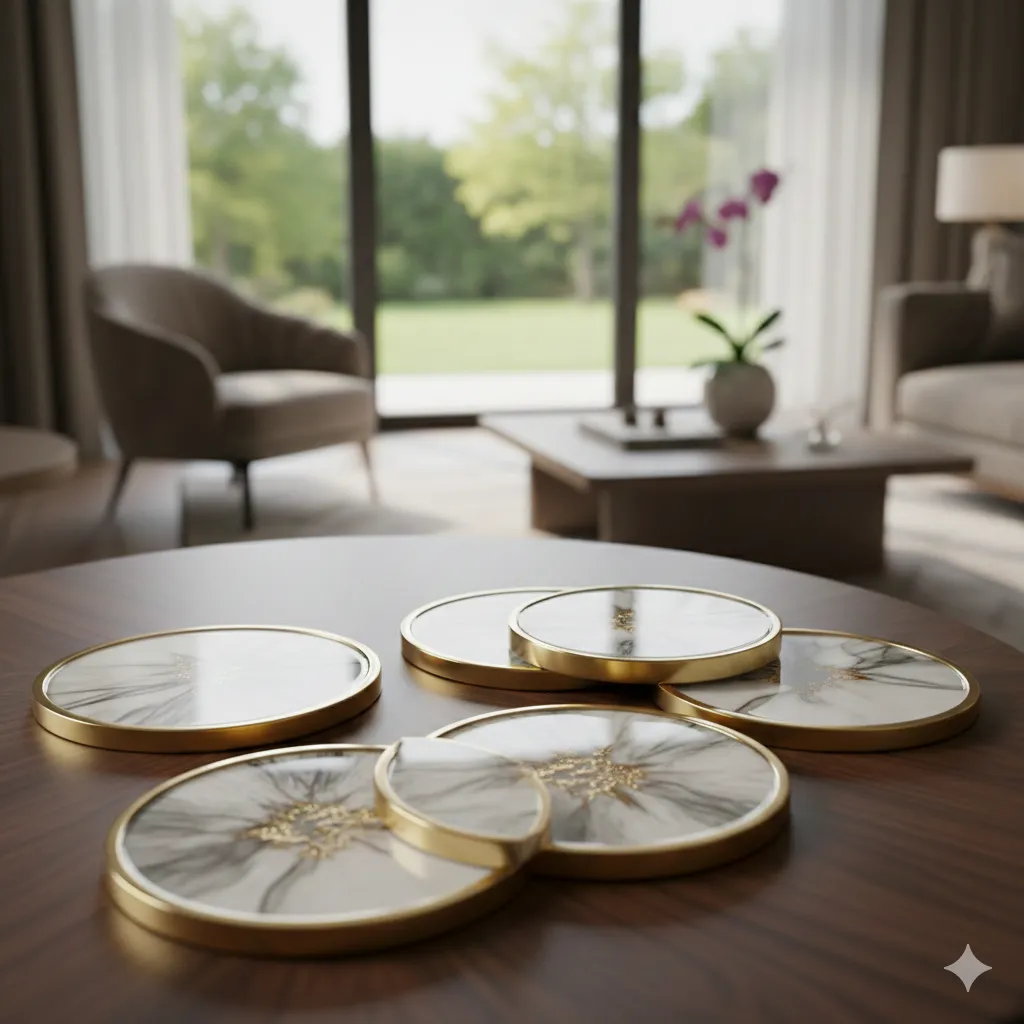
High-End Faux Marble on a Budget
You don't need a slab of Italian stone to get that luxury vibe. You can mimic white Carrara marble by using a solid white base and just a tiny amount of black or gray dye. The key is to barely touch it; use a toothpick to drag thin "veins" through the white. If you over-mix, you’ll just end up with gray coasters, so less is definitely more here.
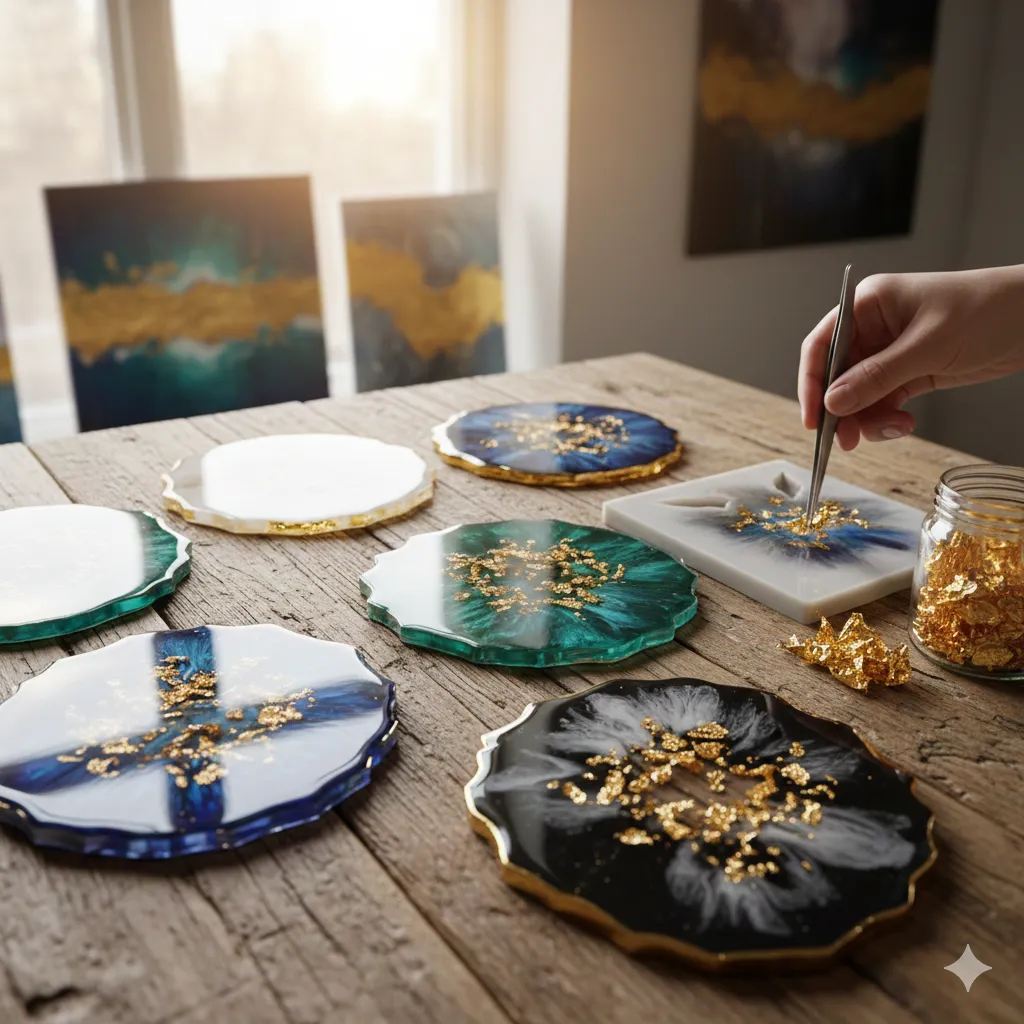
Adding a Touch of Gold Leaf
Metallic leaf is basically a cheat code for making things look expensive. You can find packs of gold, silver, or copper flakes at any craft store. I love dropping them into the center of a clear pour or lining the edges to create a "gilded" look. Since the leaf is so light, it tends to float and dance around in the resin, which gives the finished piece a lot of 3D depth.
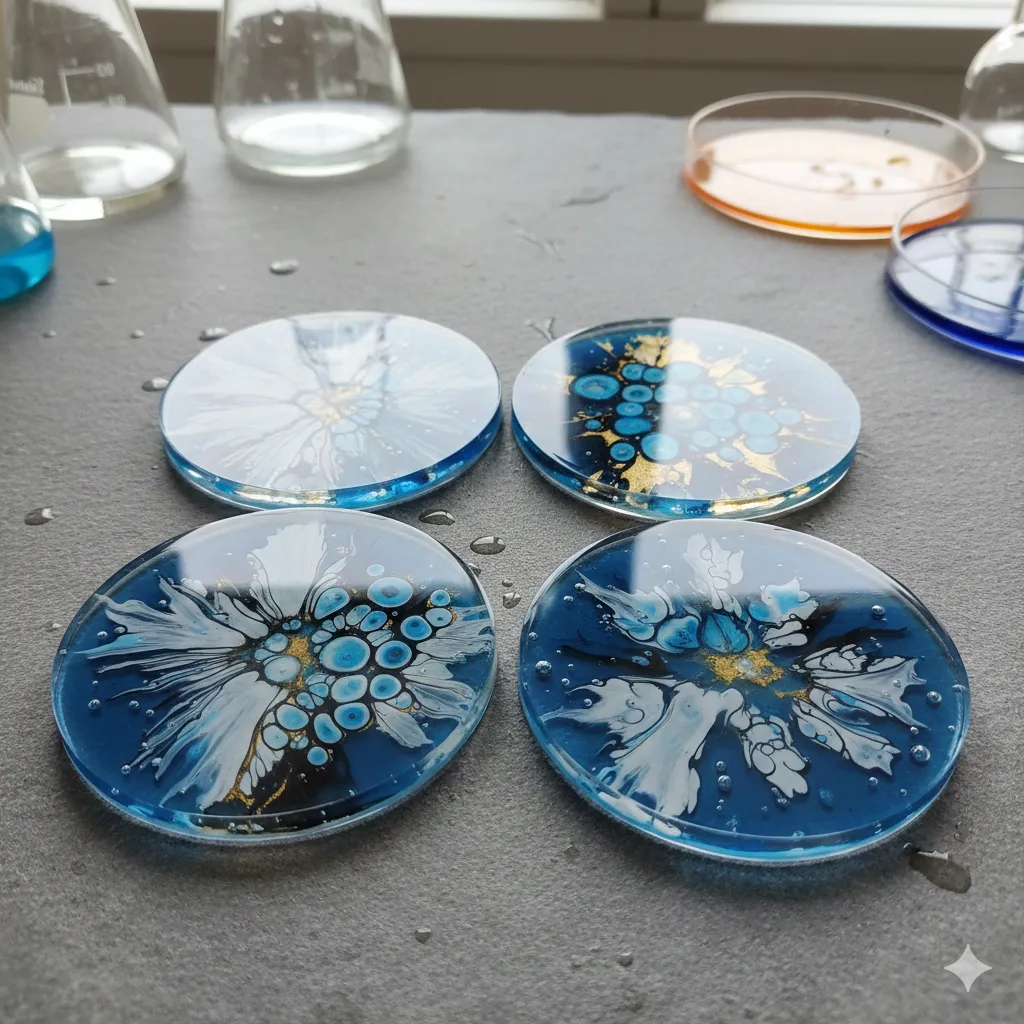
The "Petri Dish" Ink Bloom
This is probably the most addictive technique on this list. You fill your mold with clear resin and then drop alcohol inks onto the surface. On their own, the inks just sit there, but if you add a "heavy" white ink on top, it pushes the color down into the resin in long, spindly "tentacles." It creates a funky, mushroom-like effect that looks incredible once you de-mold the piece.
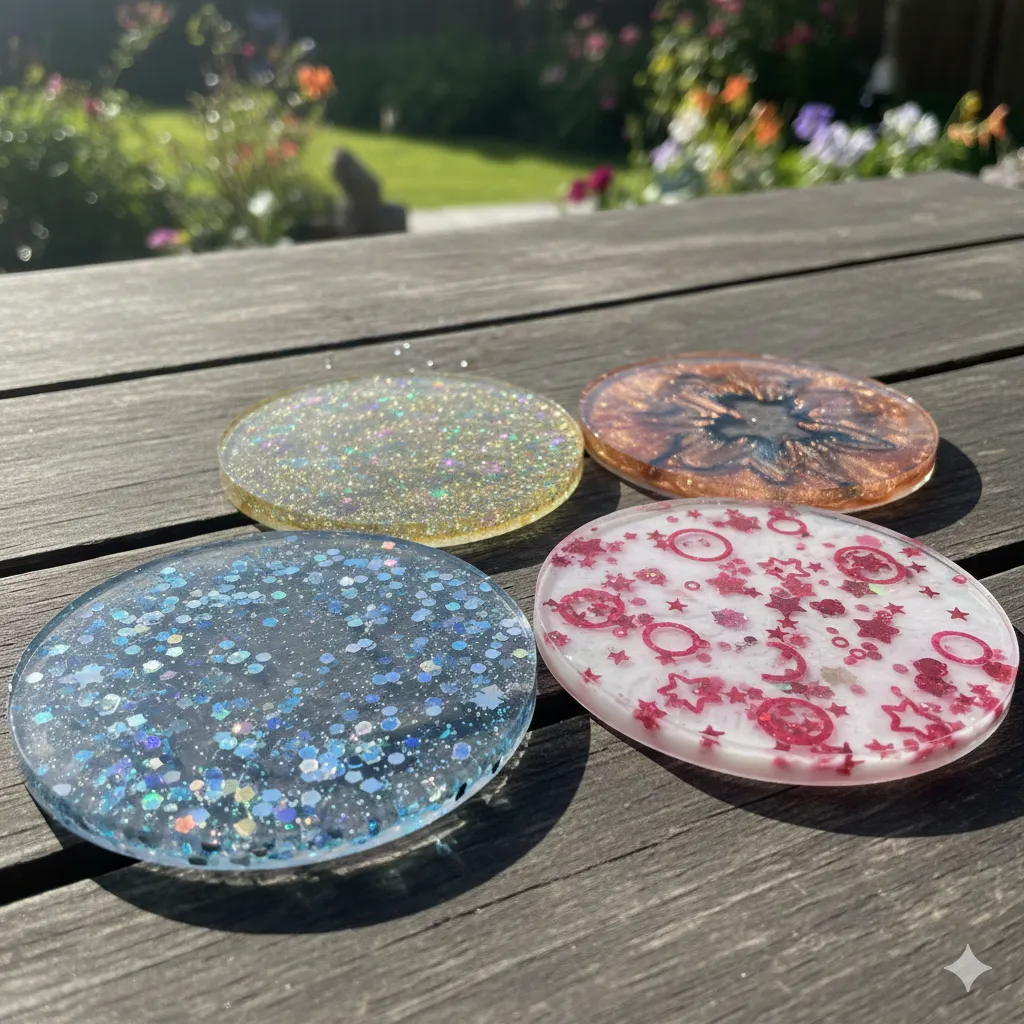
Going Big with Glitter
Glitter isn't just for kids' crafts anymore. When you suspend fine holographic glitter in clear resin, it creates a finish that catches the light from every single angle. For a more modern look, try a "glitter gradient" where the sparkle is heavy on one side and fades into total clarity on the other.
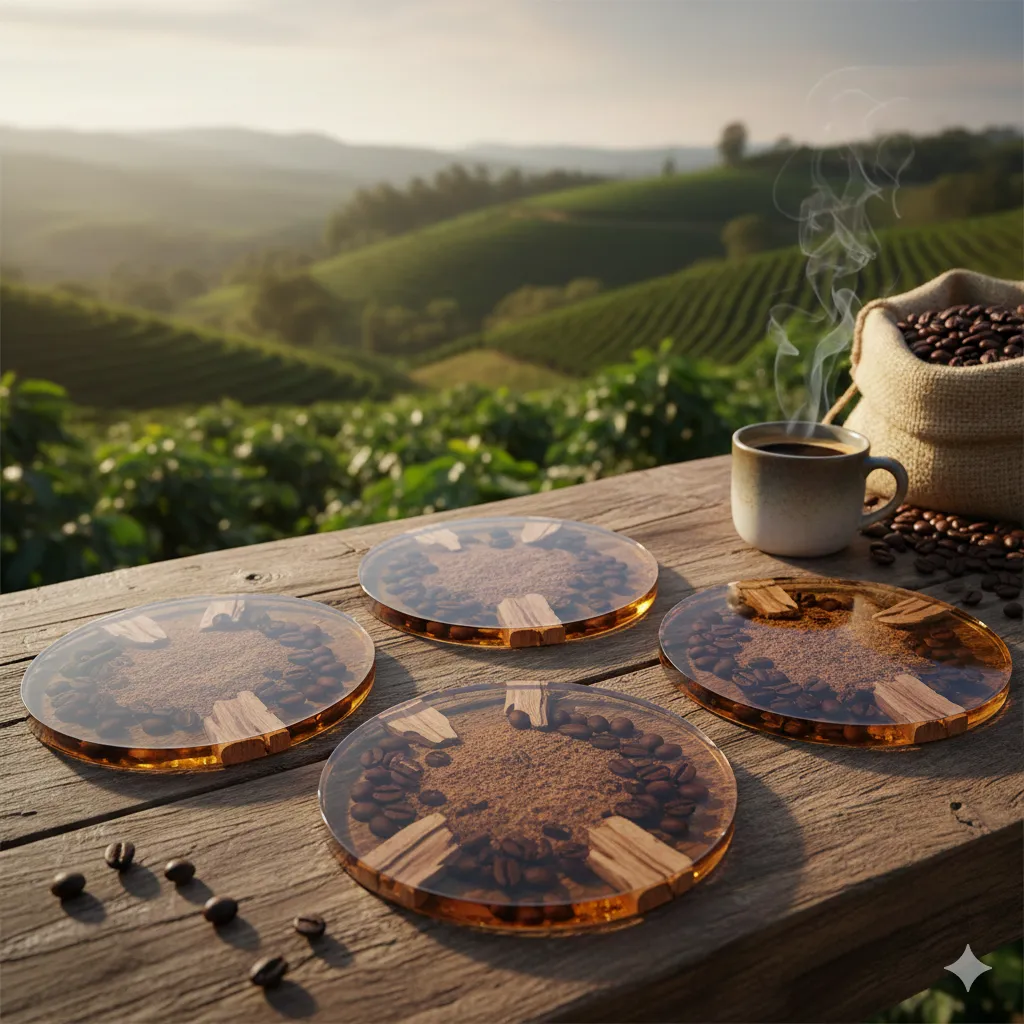
Rustic Coffee Bean Inlays
This is a personal favorite for kitchen decor. Dropping real coffee beans into a clear or slightly tinted brown resin creates a textured, organic look. Plus, if you’re making these as a gift for a coffee lover, the aesthetic is spot-on. Just be sure to pop any bubbles that get trapped in the nooks and crannies of the beans using a quick pass with a lighter.
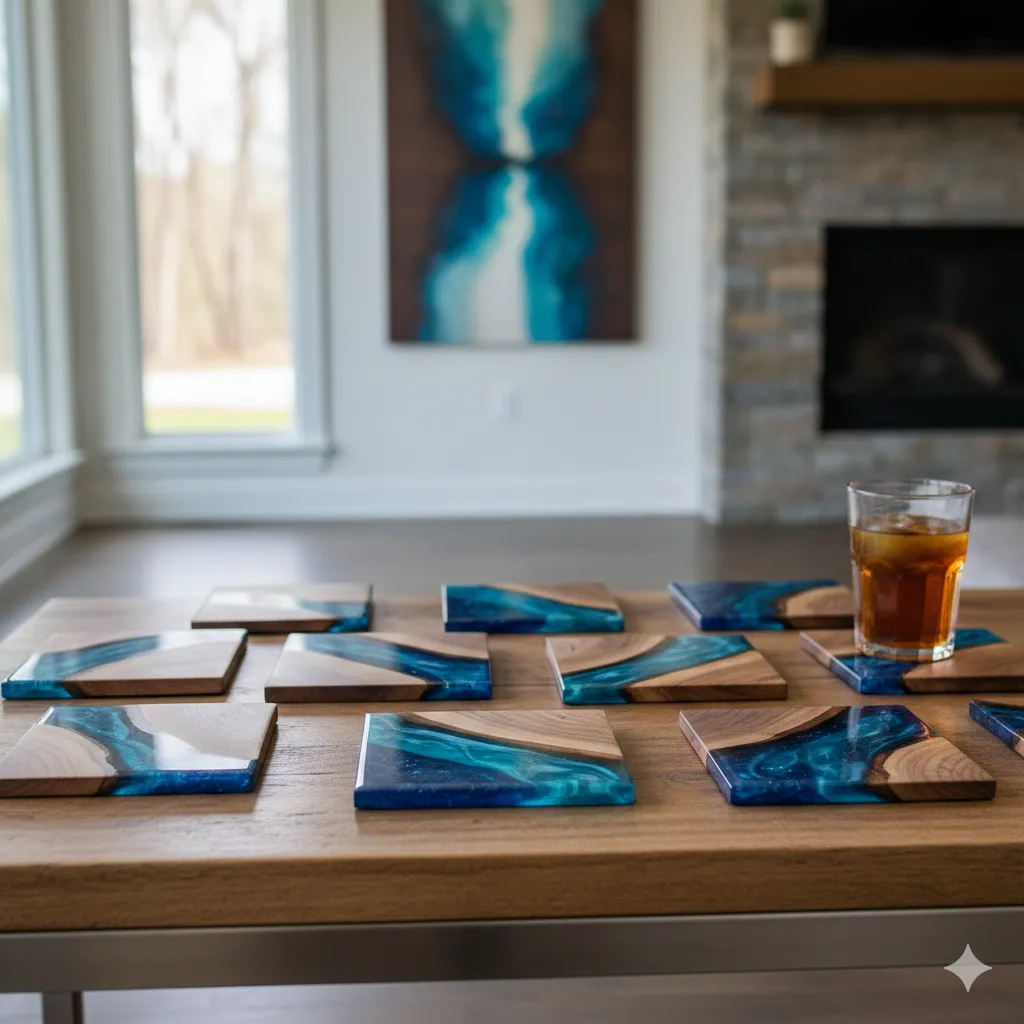
Modern Wood and "River" Designs
If you have some small wood scraps lying around, don't throw them away. You can snap off small pieces of cedar or pine and place them directly into the coaster mold. When you pour colored resin (a deep emerald or "river blue" looks great) into the gaps, you get a miniature version of those high-end river tables. It’s a great way to mix organic textures with sleek plastic.
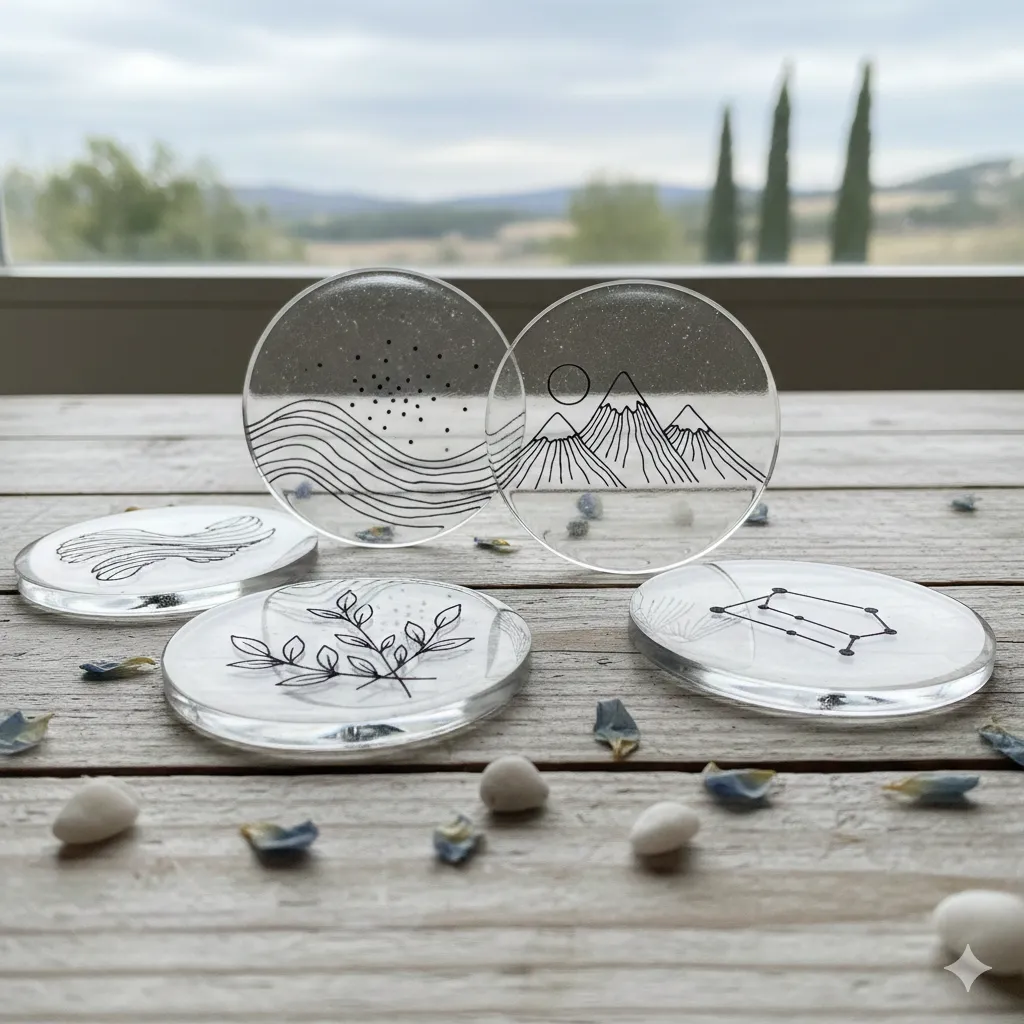
Hand-Drawn Minimalist Line Art
For those who want a more "indie" look, try adding line art. You pour a base layer, let it cure completely, and then use a fine-point paint marker to draw simple shapes—think abstract faces or leaf outlines. Once the ink is dry, pour a thin clear topcoat over it. This "sandwiches" the drawing inside, giving it a cool floating effect.
Neon and Glow-in-the-Dark Accents
If you want something that pops at a party, try glow powders. You can mix these pigments into the resin or swirl them into clear pours. They look like bright, neon coasters during the day, but they’ll give off a cool, radioactive-style glow once you dim the lights. It’s a fun, unexpected twist for an outdoor patio set.
A Few Tips Before You Pour
Resin is all about the prep work. Make sure your table is perfectly level before you start, or you’ll end up with lopsided coasters. Also, don't rush the mixing process; three full minutes of stirring is usually the sweet spot to ensure everything cures properly without any sticky patches. Once you get the hang of these basics, the design possibilities are pretty much endless.

QUICK LINKS:
Resin Live
SD PRO COURSES:
GET IN TOUCH:
ADDRESS:
SCO : 16, Curo One by Marbella,
New Chandigarh, Punjab - 140901
Phone: (+91) 6280667106
Email: [email protected]
FOLLOW:
© Copyright 2026 SD Academia